Specifying Selective RPS Extract Options
The Selective sheet is displayed when you have selected the Selective Extract option button in the Extract Options sheet and you then click the Selective sheet.
The Selective sheet, shown in the following image, is also displayed when you click the Show Items on Selective Sheet button on the Changes sheet if you are extracting patch version changes only.
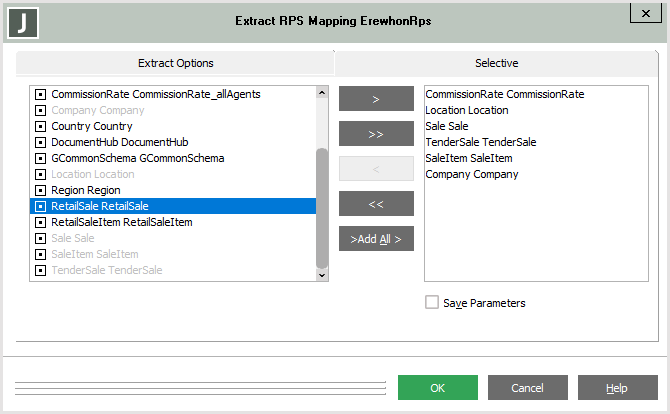
The Selective sheet enables you to specify selected class maps that are to be extracted from your RPS mapping.
All class maps in the RPS mapping are displayed in the list box at the left of the sheet by default, to enable you to make your selections. If the class is mapped to multiple tables in a class map, the table-list value contains all tables in that class map. If a class has subclasses mapped to a single table, each subclass mapping is listed separately.
To specify your RPS mapping selections
-
From the candidate class maps list box at the left of the sheet, select one or more class maps that you want to extract to a file. Use one of the following actions to select the required class maps.
-
Double-click on the appropriate class map.
The selected class map is then displayed in the selected objects list box at the right of the sheet.
-
Click on a class map that you want to extract and then click the > button to move the selected class map to the selected objects list box.
-
To move all displayed class maps to the selected objects list box, click the >> button or the >Add All > button. All class maps are then displayed in the selected objects list box at the right of the sheet.
-
Use the Shift or Ctrl key to select a group of class maps and then click the > button to move the selected objects to the selected objects list box.
When class maps have been selected for extraction, they are disabled in the candidate objects list box.
You can locate a specific class map in the candidate objects list box by pressing the F4 key. The Find Type dialog is then displayed, to enable you to specify or select the class map that you want to locate.
-
-
You can move class maps selected for extract from the selected objects list box back to the candidate objects list box, to exclude them from the extract.
The actions required to do this are identical to those described in step 1, except that you use the < button to move single items and the << button to move all items selected for extract back to the candidate objects list box.
-
Check the Save Parameters check box if you want your selected class maps to be saved to a parameter file.
A parameter file can be reused for subsequent RPS mapping extracts to specify the class maps to extract. By default, the selections that you make are not saved in a parameter file.
-
When all class maps that you want to extract from your RPS mapping are displayed in the selected objects list box on the right of the sheet, click the OK button.
If you are creating a parameter file, the common File dialog is then displayed, to enable you to select the location and name of your parameter file. By default, the file location is your JADE working directory and the file name is the RPS mapping name with an .unl extension; for example:
ErewhonRPS.unl
For details about the parameter file, see "Parameter File Syntax" under "Specifying Your Parameter File Options", in Chapter 10.

