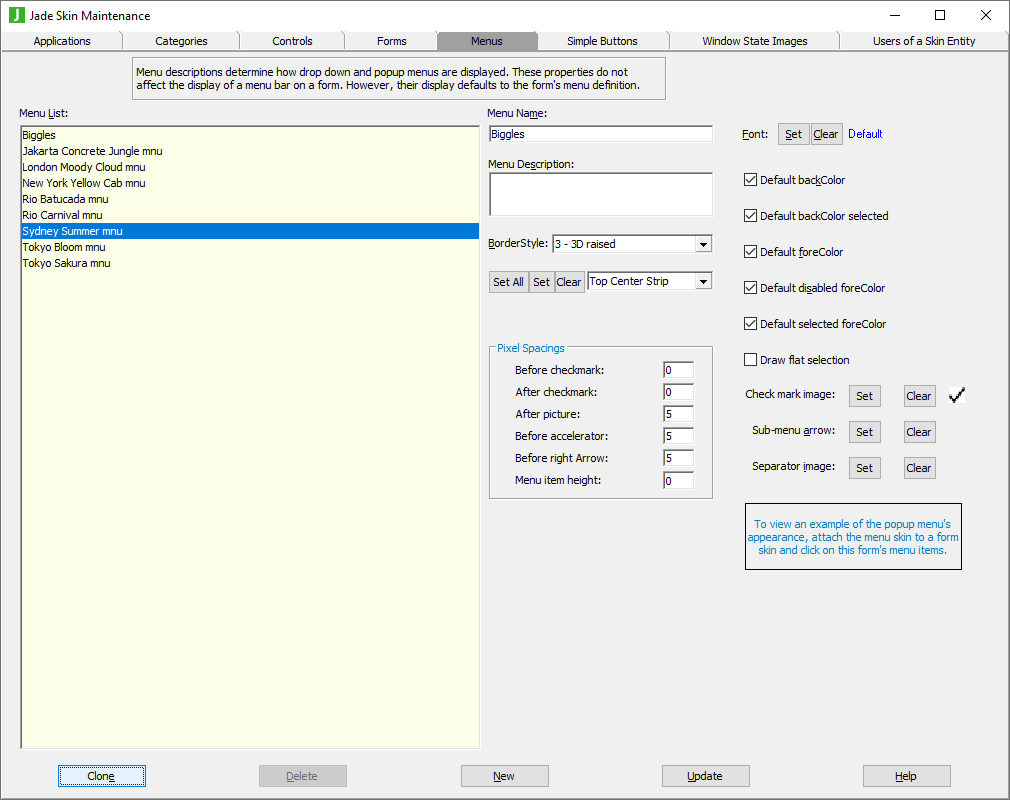
Using the Menus Sheet
The Menus sheet, shown in the following image, is displayed when you select the Menus tab in the Jade Skin Maintenance dialog.
To add a menu skin
-
Click the New button if another menu is selected.
-
Enter the name of the menu skin in the Menu Name text box or select the skin from the Menu List list box.
Menu names must be unique.
-
Enter a description of the menu in the Menu Description text box, if required.
-
In the BorderStyle combo box, select the border style that you require for your menus if you do not want the default three-dimensional border style used.
-
If the border style is set to 4 – use border images in the BorderStyle combo box, you can set these images by clicking the Set All button that requests the loading of all pictures that describe the skin.
A series of common File dialogs is then displayed, to enable you to locate each of the pictures required in turn. The dialog title displays the required image. If you do not have a file for a specific image or you do not want to specify a file for that image, simply click the Cancel button to enable you to select the picture file for the next image. If you cancel a common dialog display for any picture, the default image is used for that property.
When you have specified (or cancelled) the appropriate picture file for each image that you want to define, the common dialog is then closed and focus returns to the Menus sheet of the Jade Skin Maintenance dialog. Alternatively, you can perform one of the following actions.
-
Set a specific menu skin image by selecting the image type in the combo box (for example, Bottom Center Strip) and then clicking the Set button. The common File dialog is then displayed, to enable you to locate the picture file that you want to define or change.
-
Clear an existing image by selecting the image type in the combo box and then clicking the Clear button.
-
-
Use the The inner image is a brush? check box to specify whether the inner image is treated a brush to be repeatedly drawn over the whole area of the menu or whether it is an image that is drawn centered in the inner area of the menu. (By default, the inner image is a brush.)
-
Specify the required number of pixels that you require for spacing in the following text boxes in the Pixel Spacings group box.
-
Before checkmark (the default value is 0)
-
After checkmark (the default value is 0)
-
After picture (the default value is 5)
-
After accelerator (the default value is 5)
-
Before right arrow (the default value is 5)
-
Menu item height (the default value is 0)
If none of the displayed menu items has a specific entity (for example, a check mark or a picture), the appropriate column for that entity and the specified number of pixels are ignored.
-
-
If you do not want the default Windows font to be used for your menu skin, click the font Set button. The common Font dialog is then displayed, to enable you to select the required font and its attributes.
Alternatively, click the font Clear button to restore the default font of the form.
-
Uncheck the following check boxes at the right of the sheet if you do not want your menu skin to use the:
-
Default backColor
-
Default backColor selected
-
Default foreColor
-
Default disabled foreColor
-
Default selected foreColor
-
-
Check the Draw flat selection check box if you want a selected menu item always drawn in a flat manner using the defined menu item selection colors (with no surrounding border). In addition, the menu item is not drawn as though it is part of the popup menu.
This check box is unchecked by default; that is, the selected menu item is drawn using the effective menu item selection background and foreground colors with a border that is the same color as the text of the menu item. In addition, when a menu is dropped down directly below menu item (the menu does not need to be moved to fit on the current display), the selected menu item is drawn as though it is part of the dropped‑down menu using the same background color and text color defined for the popup menu.
-
If you want to select the image that is displayed for the check mark, the arrow that indicates a submenu, or the menu separator, click the appropriate Set button.
The common File dialog is then displayed, to enable you to select the existing image that you want displayed for the check mark, submenu arrow, or separator. To apply the image, click the Open button in the common dialog.
When you have selected the appropriate picture file for the image, the common dialog is then closed and focus returns to the Menus sheet of the Jade Skin Maintenance dialog. In addition, your selected image is displayed at the right of the Clear button for that entity.
-
If you want to remove the current check mark, submenu arrow, or separator image, click the Clear button at the right of the appropriate entity. The image is then removed from the right of the Clear button on the Menus form.
-
Click the Update button.
To try out a menu skin, define the menu skin as one that is used by a form skin and then click on the menu item displayed for this form when the Forms sheet has focus.
If the menu does not fit on the menu line, the menu is extended to include additional lines as required. Each line is drawn with the same skin images as the first menu line.
To update an existing menu skin
-
In the Menu List list box, select the menu skin that you want to change. The name of the selected skin is then displayed in the Menu Name text box.
-
Edit the appropriate data to meet your requirements. (For details, see steps 2 through 12 in the previous instruction for adding a menu skin.)
-
Click the Update button.
To delete an existing menu skin that is not currently referenced
-
In the Menu List list box, select the menu skin that you want to delete. The name of the selected skin is then displayed in the Menu Name text box.
-
Click the Delete button.
The Delete button is disabled if the menu skin is referenced by any form skin entry.
For details about cloning an existing skin of menus, see "Cloning Skins", elsewhere in this document.

