Building a Default Reporting View Definition
Use the Build to file command from the View menu to quickly create a reporting view. The Build to file command extracts all candidate classes and features for the schema that you specify and adds them to a new reporting view. You can then load this reporting view by using the Load definition command and edit it manually.
Creating a reporting view in this way differs from the standard operation, in which you individually specify the types and features that form your reporting view.
For details about the standard selection of types and features to create a view, see "Selecting the Schema, Types, and Features for Your Reporting View", earlier in this chapter.
To build a reporting view definition
-
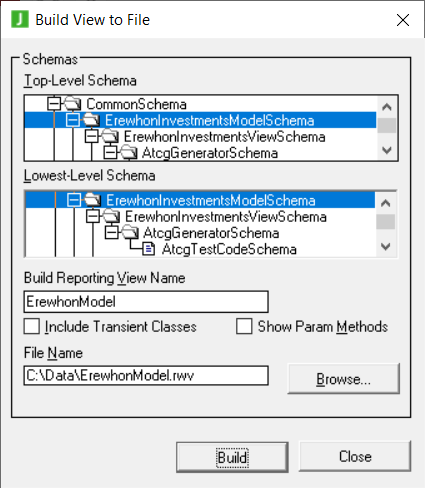
Select the Build to file command from the View menu.
The Build View to File dialog, shown in the following image, is then displayed.

-
In the Schemas list box, select a schema from the schema hierarchy that is displayed. The new reporting view is based on the selected schema.
-
In the Build Reporting View Name text box, enter the name of the reporting view that you want to build.
-
If you want to include transient classes in your view, check the Include Transient Classes check box.
By default, the Include Transient Classes check box is unchecked.
The transient classes option enables you to build complex queries by combining data into a composite transient class and then using the JADE Report Writer to report on the transient data. For more details, see "Reporting on Transient Classes", earlier in this chapter.
-
If you want all classes to have the check box in the Show Methods column of the Select Types table selected, when the view is opened, check the Show Param Methods check box. As explained in "Selecting the Features for Your View", earlier in this chapter, methods with primitive
parameters are displayed in addition to methods with no parameters, which are always shown.
-
In the File Name text box, enter the extract file to which you want to save your reporting view.
To select a file name location, click the Browse button. The common File dialog is then displayed, to enable you to select the appropriate file.
-
Click the Build button. Alternatively, click the Close button to abandon your selections.
A progress dialog is displayed while the view is being built. Click the Cancel button on the progress dialog to abandon the build process at any time, if required.
The build process extracts all candidate classes and features from your selected schema.

