Configuring IIS
The configuration instructions are grouped into the following subsections.
-
Check that important IIS components are installed
-
Add and configure an application (and application pool) for the WebShop application
-
Add a virtual directory for WebShop image files
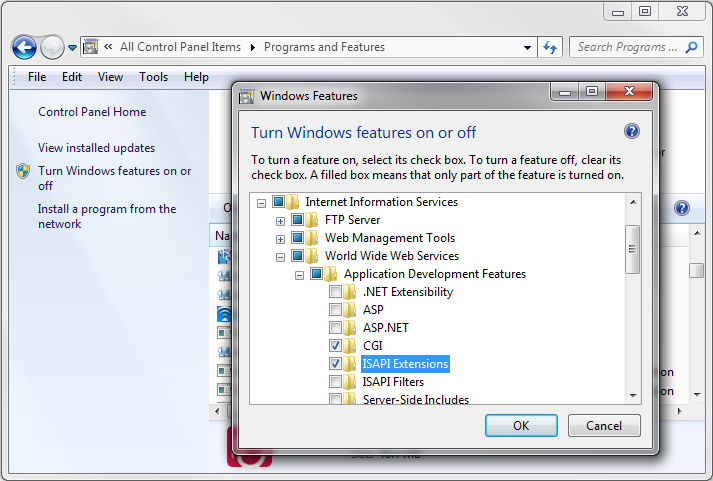
Step 1: Installing CGI and ISAPI Extensions
To install these optional components of IIS:
-
Select Programs and Features from the Control Panel.
-
Click the Turn Windows features on or off hyperlink on the left.
-
Expand Internet Information Services, then World Wide Web Services, and then Application Development Features.
-
Check the boxes CGI and ISAPI Extensions and then click the OK button.

Step 2: Adding an Application Pool
To add an application pool to be used by Jade web applications:
-
Select Administrative Tools from the Control Panel.
-
Open Internet Information Services (IIS) Manager.
-
In the Connections panel on the left, select Application Pools.
-
Right‑click and then select Add Application Pool.
-
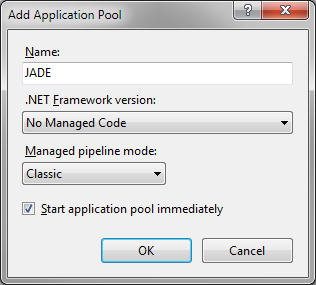
Configure the pool to use unmanaged (non‑.NET) code and then set the Managed pipeline mode field to Classic, as shown in the following image.

-
If you are using a 32‑bit version of Jade, right‑click on the application pool and then select Advanced Settings. In the Advanced Settings dialog, set Enable 32‑Bit Applications to True.


Step 3: Adding an Application
To add an application:
-
Select the Default Web Site in the Connections panel.
-
Right‑click and then select Add Application.
-
Enter the alias JadeEval. (This will be part of the URL for the WebShop application.)
-
Select the application pool that you created previously.
-
Enter the location of the Physical path, which is the bin folder for your Jade release; that is, replace <install‑dir> in the following image with the correct location.

-
Click the OK button.

Step 4: Configuring Handler Mappings for the Application
To configure handler mappings for the application:
-
Select the application in the Connections panel.
-
Double‑click the Handler Mappings icon in the central panel.
-
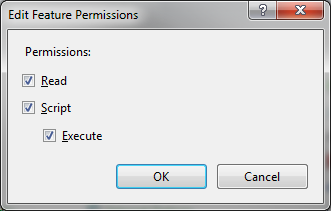
Right‑click the CGI-exe handler mapping and select Edit Feature Permissions.
-
Enable all options, as shown in the following image.

-
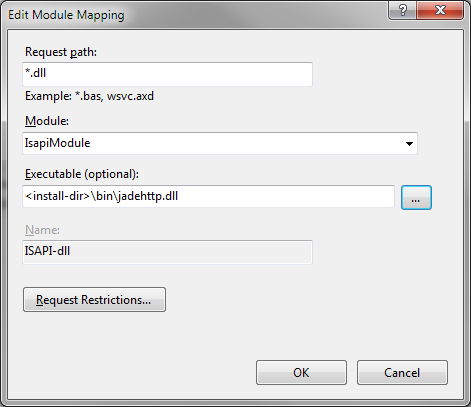
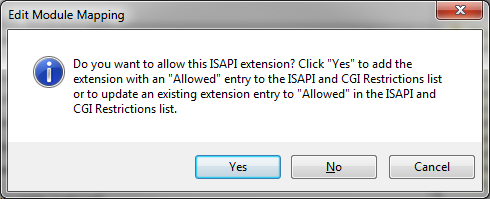
Right‑click the ISAPI-dll handler mapping and then select Edit.
-
Set the Executable text box to the path and file name of the jadehttp.dll file in the bin folder of your Jade system.

-
If the following dialog is displayed, click the Yes button.

Step 5: Adding a Virtual Directory for Images
To add a virtual directory for images:
-
Ensure that a C:\Temp folder exists on your machine.
-
Select Default Web Site in the Connections panel.
-
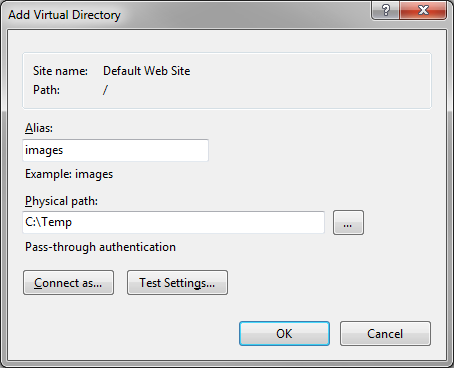
Right‑click and then select Add Virtual Directory.
-
Complete the dialog as shown in the following image and then click the OK button.

-
Now start IIS for your website.
Ensure that you have shut down any open Jade sessions before proceeding further. This includes the Jade Platform development environment and the Jade application server.