Selecting Tables
When you click the Select button in the Multiple Extracts group box (for the initial selection order) or the Tables group box of the Data Extract dialog, the RPS Table Selection dialog is then displayed. For details about extracting RPS mapping data, see "Extracting Data from the Jade Database", earlier in this chapter.
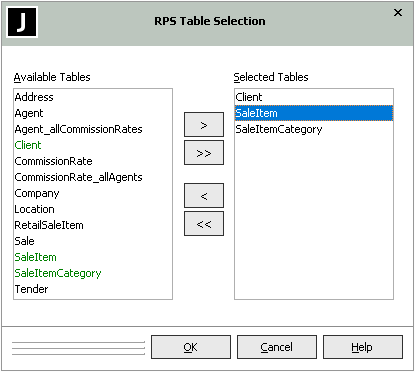
The following image shows an example of the RPS Table Selection dialog.
In the Available Tables list box, green tables indicate those already selected, gray tables are historical tables that cannot be selected (if you are not extracting historical tables), and black tables are those that are available for selection.
-
To select a table, perform one of the following actions.
-
Select one or more of the tables listed in the Available Tables list box (by using the Shift or the Ctrl key to make multiple selections), and then click the single right-arrow (>) button.
Only the selected table or tables are moved to the Selected Tables list box.
-
To select all tables in the Available Tables list box, click the double right-arrow (>>) button. All tables are then moved to the Selected Tables list box.
-
-
To remove a table from the Selected Tables list box, perform one of the following actions.
-
Select one or more of the tables in the Selected Tables list box (by using the Shift or the Ctrl key to make multiple selections) and then click the single left‑arrow (<) button.
-
To remove all tables in the Selected Tables list box, click the double left-arrow (<<) button. All tables are then moved to the Available Tables list box.
-
-
To move a selected table up or down the selected order (for initial selected extract order only), select one or more of the tables in the Selected Tables list box and then click the Up button to move the table up one place in the selected tables order or the Down button to move the table down one place.
-
Click the OK button when you have selected all tables that you want to include in the data extraction. Alternatively, click the Cancel button to abandon your selections. The Data Extract dialog is then displayed.


