Using Grids to Position Controls on Forms
A grid assists you in positioning your controls on a form.
You can toggle the display of a grid or you can change your grid options, as required.
To access the Grid Options dialog
-
Click the Grid toolbar button (toggles the grid display on or off only).
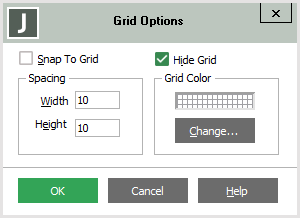
When you select the Grid command from the Options menu, the Grid Options dialog shown in the following image is then displayed.
To specify your grid options
-
Check the Snap To Grid check box if you want to control the placement of your controls.
When this feature is enabled, the grid lines dictate the placement and movement of the controls on your form, and controls snap to the grid even when the grid is not displayed.
For Web forms, the Snap To Grid check box is checked by default.
-
Uncheck the Hide Grid check box if you want the grid displayed in your Painter windows.
-
In the Spacing group box, use the Width and Height text boxes to change the default horizontal and vertical spacing of your grid from the default values of 10 pixels, if required.
-
In the Grid Color group box, click the Change button if you want to change the color of your grid lines. The common Color dialog is then displayed. Select the color that you want for your grid and then click the OK button.
If you are using a 16-color palette, the default grid color may match the background color and you will therefore need to use this feature to make the grid visible. In other cases, changing the grid color is optional.
-
Click the OK button. Alternatively, click the Cancel button to abandon your selections.

