Example of Designing a Menu
The following subsections provide an example of menu creation using the File menu Menu Design command.
Creating the Menu Bar
When you access the Menu Design command from the File menu, the Menu Design dialog is then displayed. Start designing your menu by defining the menu bar.
You must provide at least a caption for all menu items and you must provide a name for menus defined at the lowest level; that is, menus that have no submenus. (The name is optional at all other menu levels).
Use the top half of the Menu Design dialog, shown in the following example, to define the properties for each menu item.
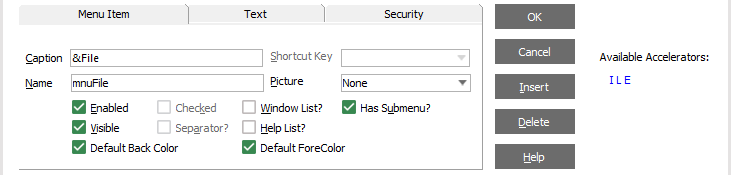
The lower half of the dialog displays the menu that you are building.
Creating the First Submenu Level
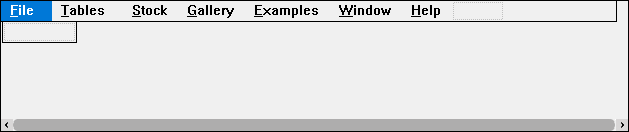
When you click one of your menus on the menu bar, the blank cell that is automatically displayed below it is the position for your first submenu entry. In the following image, the File menu has been clicked.
A blank cell is created for your next entry each time you enter a command on a submenu.
You can create submenus for each of your submenus, simply by clicking the Has Submenu check box on the Menu Design dialog. In the following image, three submenu items have been added to the Faults menu.

Adding Further Submenu Levels
When you check the Has Submenu check box on the Menu Design dialog, a further level of submenus is created, with the first empty cell marked for your entry.
In the following example, the Suppliers command has had a submenu created for it, with two menu items: List and Brands.
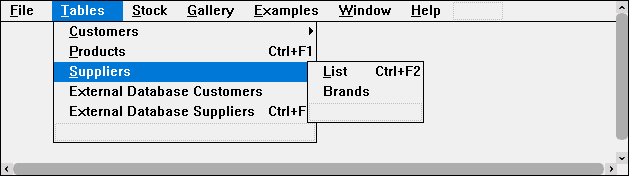
In this example, a submenu has already been defined for the Customers command, indicated by the arrow symbol at the right of the command.
This submenu can be displayed and maintained simply by clicking the Customers menu. (For details about assigning a shortcut key to a menu item that does not have a submenu, see "Maintaining Menu Item Properties", earlier in this chapter.)
Adding Standard Help and Window Menus
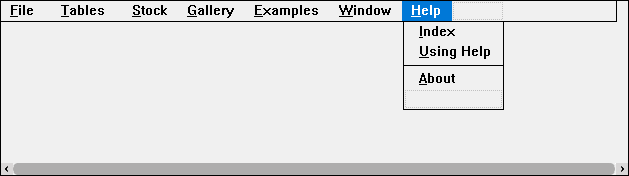
The following example shows the standard Help menu that is displayed simply by checking the Help List check box in the dialog at the upper left of the Menu Design window.
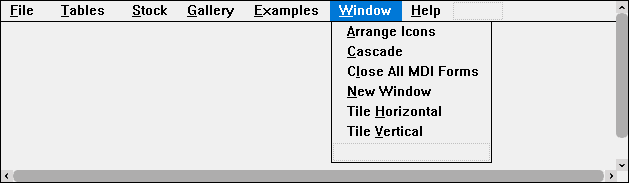
The following example shows the standard Window menu that is displayed simply by checking the Window List check box in the dialog at the upper left of the Menu Design window.
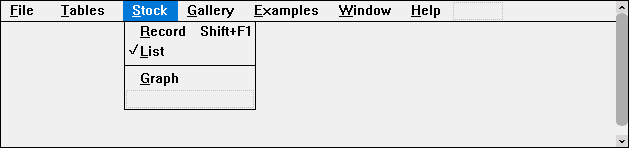
Adding More Menu Design Features
Other features of the Menu Design command are shown in the following image. Under the Stock menu, a Shift+F1 shortcut key has been selected for the Record command. On the same submenu, the List command has had the