Pushing Source Changes to the Remote Repository
When you have staged and subsequently committed all of your changes to your local repository, you can then push the changes to the remote repository. Changes are pushed from the current checked out branch to the corresponding tracked remote branch, or if there is no corresponding tracked branch, you can select a remote repository and specify a branch name that will be created on the selected remote repository. Generally, the remote branch name should match the local branch name.
Any Git user can create a repository on a server, create branches, and then make any branch the default; for example, a development team may make develop the default branch. HEAD refers to the currently checked‑out branch.
JADE supports only pushing to a bare repository; otherwise exception 8604 (Operation requiring a working directory is performed against a bare repository) is raised.
Although JADE does not currently provide the functionality to reverse a commit after it has been pushed, Git has a revert command, which you call on a specific commit or all commits, to reverse that change or those changes. You could then push this new commit so that all other members of your team pick up the reverted changes. (For details, see https://git-scm.com/docs/git-revert.)
2018.0.01 and higher
To push committed changes from the local HEAD to the corresponding remote repository branch
-
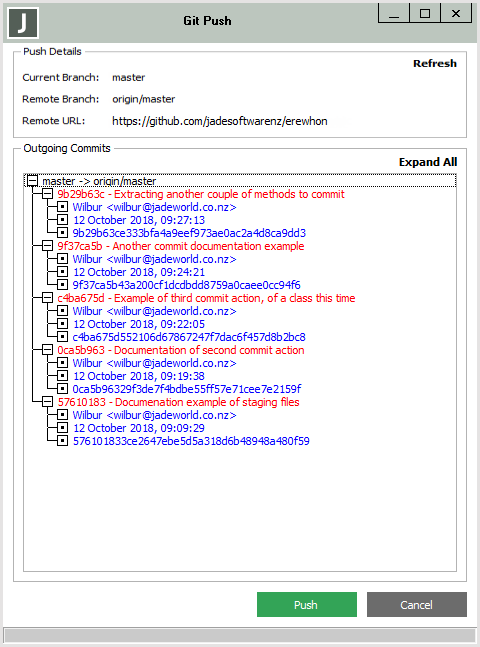
Select the Push command from the Git Source Control Client submenu in the Browse menu.
The Git Push dialog, shown in the following image, is then displayed.

If you have actioned other Git operations, click Refresh if you want to update the display of your committed changes.
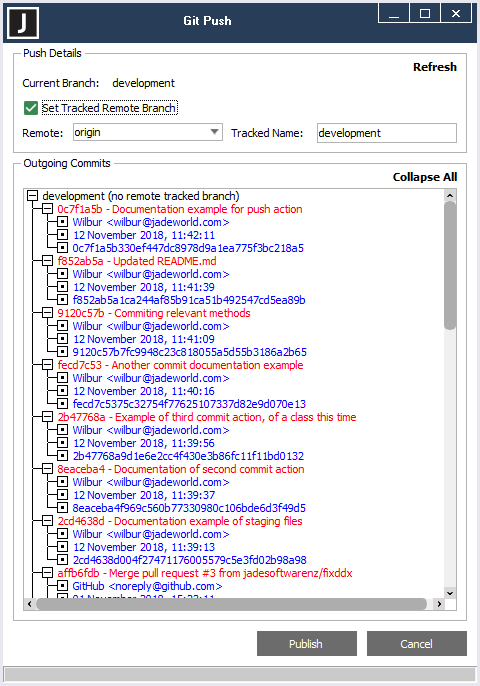
The Git Push dialog, shown in the following image, is displayed if there is no corresponding tracked branch.

To publish your committed changes:
-
Check the Set Tracked Remote Branch check box, which is unchecked by default.
The Remote combo box and Tracked Name text boxes are then displayed, and the Publish button replaces the Push button.
-
In the Remote combo box. select or specify the remote repository.
-
In the Tracked Name text box, specify the name of the tracked branch that will be created on the selected remote repository. (The remote branch name generally matches the local branch name.)
-
-
To push your committed changes from your current local repository to the corresponding remote repository tracked branch, click the Push button, or the Publish button if the local HEAD does not have a tracked branch.
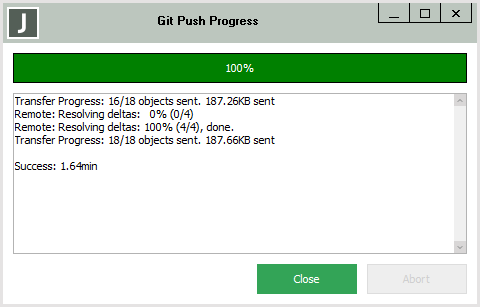
An example of the Git Push Progress form is shown in the following image. The progress form displays various status messages during the push operation, and incrementally updates the progress bar.

Alternatively, click the Abort button to abandon the pushing of your committed changes to the remote repository. Click the Close button when the push operation is complete.