Committing Source Changes to the Local Repository
Because you have a Git repository on your local file system, you do not have to be online or connected to a central (remote) repository. Commits are therefore recorded only in your local repository. They are not transferred to a remote repository until you explicitly decide to share them, by pushing your source changes to the remote repository.
You must first have specified your committer name and e-mail address in the Commit Details group box on the Source Management sheet of the Preferences dialog.
When you modify a file (for example, extracting a schema or method) it is not automatically included in the next commit. You must explicitly mark the changes that you want in the next commit operation, by adding them to the staging area in your local repository. You can commit a complete file only. If a file (for example, a method) has been modified, all changes are staged. However, if you have made more changes after the file has been staged, you must stage the file again, to include all of your changes.
To commit changes you have made to the working directory on your local workstation
-
Select the Commit command from the Git Source Control Client submenu in the Browse menu.
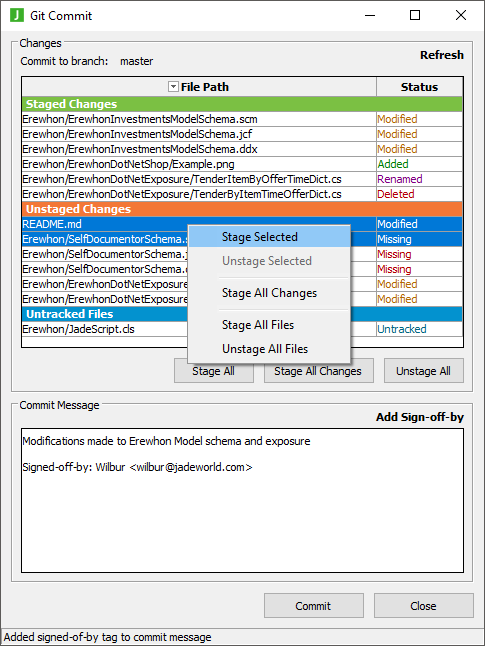
The Git Commit dialog, shown in the following image, is then displayed.

For details about the types of changes that can be displayed in the Changes table and the statuses that can be displayed, see "Source Control Staging Categories and Statuses", in the following subsection.
-
If you want to:
-
Stage specific changes:
-
In the Unstaged Changes area of the table, select the rows of the changes you want to stage.
-
Right-click, and then select the Stage Selected command from the popup menu.
-
-
Stage all unstaged changes, perform one of the following actions.
-
Click the Stage All Changes button.
-
Right-click on a row in the table, and then select the Stage All Changes command from the popup menu.
-
-
To stage all changes, including untracked files that have never been staged or committed, click the Stage All button or right-click on a row in the table and then select the Stage All Files command from the popup menu.
-
Remove the staged status of specific changes (for example, you want to exclude a change), in the Staged Changes area of the table, select the rows of the changes you want to unstage, right-click, and then select the Unstage Selected command from the popup menu.
Alternatively, to unstage all staged changes:
-
Click the Unstage All button.
-
Right-click on a row in the table and then select the Unstage All Files command from the popup menu.
-
-
-
In the Commit Message text box, click the optional Add Sign-off-by link if you want your configured Git name and e‑mail address recorded in the text of the commit message.
-
In the Commit Message text box, enter the message that describes the changes or additions you are committing. You must specify a commit message.
If a commit template is specified within any of the Git configuration files, the text of the template is automatically added to the Commit Message text box.
-
To commit your staged changes to your local repository HEAD, click the Commit button.
Alternatively, click the Close button on the Git Commit dialog to abandon your commit actions. (Note that any staging or unstaging changes that you make while the dialog is open persist, even if you click the Close button.)
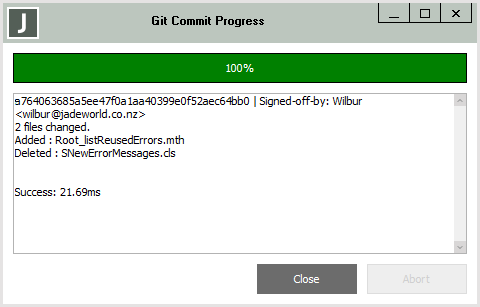
An example of the Git Commit Progress form is shown in the following image. (The first value is the unique hash (SHA) for the commit.)

2018.0.01 and higher

