Checking Out a Tag
A tag marks a specific point in Git history such as a release; for example, v1.0.
To checkout a tag
-
Select the Checkout command from the Git Source Control Client submenu in the Browse menu.
-
Select the Tag option button and the required tag from the combo box at the right of the Tag option button.
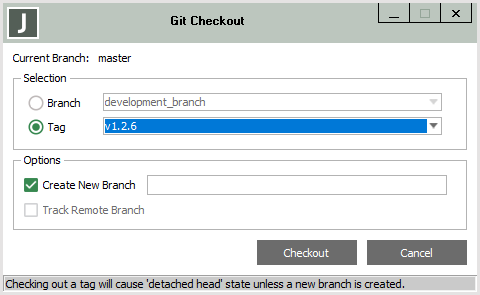
When you have selected a tag, the Create New Branch check box is automatically checked, as shown in the following image.

This check box is automatically checked because when checking out a tag, you should create a new local branch. If a new local branch is not created, a detached HEAD state occurs.
When in detached HEAD state, there is no current branch; that is, you are working at no branch. (For details, see https://git-scm.com/docs/git-checkout#_detached_head.)
-
If you are creating a new local branch, you must specify a branch name in the text box at the right of the Create New Branch check box.
-
To perform the checkout operation, click the Checkout button. (Alternatively, click the Cancel button on the Git Checkout dialog, to abandon the checkout operation.)
If the Create New Branch check box is checked and a new local branch specified, a new local branch is created with the specified name and its tip matches that of the selected tag. This new branch is then checked out into the index and working directory.
2018.0.01 and higher

