Mapping C# Features
The Feature Mappings sheet of the C# Exposure Wizard enables you to map the features in the C# exposure. As this sheet enables you to tailor the exposed features for your selected classes, classes for which no features are exposed are not displayed.
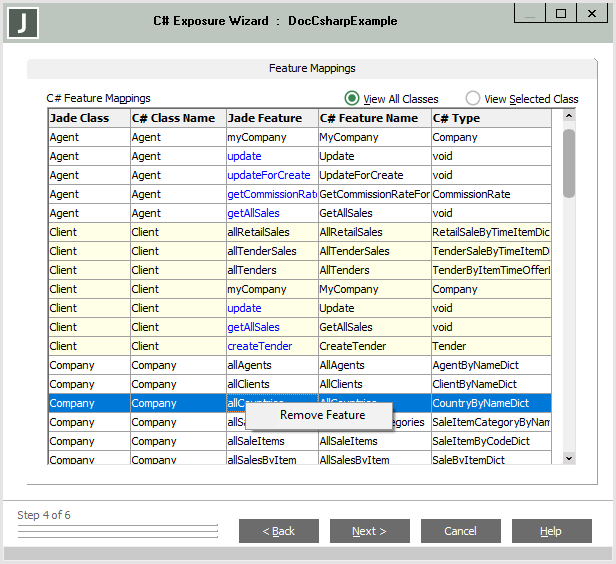
Features in the C# exposure are grouped by class, with each alternating class in the C# exposure having an alternating background color of light yellow or white, making it easier for you to distinguish between the classes when all classes are viewed on the Feature Mappings sheet.
By default, features for a selected class are displayed, as shown in the following image.
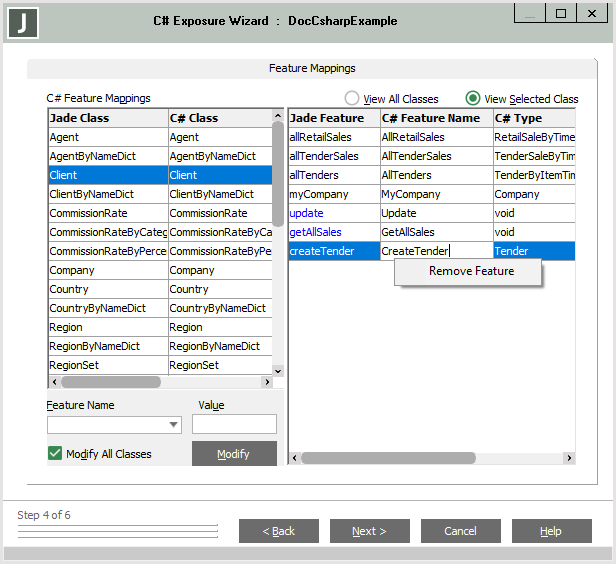
If methods or constants are included in the C# exposure, these are displayed in a blue or green font, respectively. (Properties are displayed in a black font.)
To specify your feature mappings
-
If you want to change the name of a feature, click in the required cell of the Feature Name and then change the name to the value that you require. The name must be a valid C# name. An error message box is displayed if you do not specify a name for the C# feature or if the specified value is already defined for this class.
-
If you want to change the feature names of a class or the feature names of all classes:
-
If you do not want the prefix or suffix to apply to all classes in the C# exposure, uncheck the Modify All Classes check box. (A prefix or suffix value applies to all classes by default.)
-
Ensure that the appropriate Add Prefix, Add Suffix, Remove Prefix, or Remove Suffix value is displayed in the Feature Name list box.
-
Specify the prefix or suffix value in the Value text box (for example, test_) that you want to apply to features in a specific class or to all classes in the C# exposure.
-
Click the Modify button.
If the change that is being attempted would result in a duplicate feature name, a message box is displayed, informing you that the change cannot be actioned. As no update action takes place, you must change the feature name manually.
-
-
To remove a selected feature from the C# exposure, right-click on that row and then select the Remove Feature command from the popup menu that is displayed.
To display features for all classes, click the View All Classes option button at the upper right of the sheet, to display only the features in the class whose row is selected in the Feature Mappings table.
An example of the Feature Mappings sheet for all classes is shown the following image.