Using the Sort Order Sheet
Use the Sort Order sheet of the Profile Properties dialog to specify a sort order for your report when the currently selected profile is applied.
This sheet enables you to select fields to control the sequence of your report. You can select multiple fields, specify ascending or descending sequences at the field level, and specify case-sensitivity at the field level.
To specify or change the sort order
-
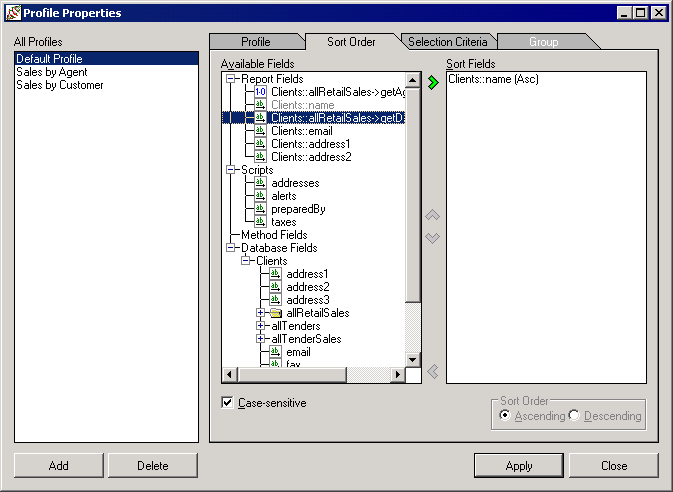
Click the Sort Order tab of the Profile Properties dialog.
The Sort Order sheet, shown in the following image, is then displayed. (The Sort Order sheet is displayed by default when you select the Sort Order command from the Profile menu to display the Profile Properties dialog.)

-
Select a field on which to sort from the Available Fields list box in the center of the dialog. The selected field and the right arrow are then highlighted.
The list of fields in the Available Fields list box is derived from the database fields specified in the reporting view during the configuration phase and the report fields that you have defined in the current design. Available report scripts are only those that do not, directly or indirectly, reference a summary field. If you are creating profiles before starting to design your layout, only the database fields are displayed. For details about configuring your reporting view, see "Selecting the Schema, Types, and Features for Your Reporting View", in Chapter 3.
Fields of maximum length (for example, allSaleItems::fullDescription of type String with max length) specified as sort fields are used as fields with a maximum length of 100. (Maximum length fields are not valid as sort fields, as they exceed the JADE-defined limit for use in collection operations.)
If the total length of the combined sort and group fields exceeds the JADE-defined limit of 512 characters for the keyed dictionary used to implement sorting, string fields are reduced to 50 characters, and if the limit is still exceeded, the lower-order fields are dropped until the total length is less than the limit.
-
Click the right arrow to complete the selection of the sort field.
The selected field is then displayed in the Sort Fields list box at the right of the dialog and disabled (dimmed) in the Available Fields list box at the left. In the previous image, the name field has been selected.
-
For string fields, uncheck the Case-sensitive check box if you do not want to include case-sensitivity when sorting on this field; that is, you want capital letters to have the same value as their lowercase counterparts.
By default, the check box is checked for string fields, indicating that sorting is case-sensitive. Case-sensitivity does not apply to single character fields, and in this case the check box is disabled.
-
Select the Descending option button if you want to sort this field in descending order.
By default, sorting is in ascending sequence.
-
If required, select another field to sort on by using the steps 2 through 5, earlier in this instruction.
The following image shows the result when the date database field is selected with the Descending option.

When this profile is applied to the report, the data is printed in client name sequence and the sales are printed starting with the most recent sale for each client.
-
If you want to remove a field from the sort sequence, select it in the Sort Fields list box and then click the left arrow.
The selected field is then removed from the Sort Fields list box and enabled again in the Available Fields list box.
-
If you want to change the order of the sort fields in the Sort Fields list box, select the field you want to move and then click the up arrow or the down arrow, as required.
In the image shown in step 6, only the up arrow is enabled because the selected field is the last field in the list and can only move up. In this example, if you click the up arrow, the field Clients::allRetailSales -> date is moved above the Clients::name field.
This effectively changes the report to show detail in reverse date sequence, printing a client name list within each date.
-
Click another tab if you want to make changes on other sheets of the Profile Properties dialog.
-
Click the Apply button to apply the additions or changes you have made or click the Close button to close the Profile Properties dialog.
To save the recent additions or changes when you close the dialog, you must click the Apply button immediately prior to closing the dialog. To abandon any additions and changes that you have made but not yet applied, do not click the Apply button immediately prior to clicking the Close button.