Updating an Existing Group
Use the Profile Properties dialog to update groups. You can update your groups against any profile. If you are not using profiles, you can update the group against the default profile. However, changing group details for different profiles can provide you with different versions of your report.
If you make group changes based on profiles, you can run any version of your report by specifying a unique profile name for each version. For example, one profile can produce your report in ascending group sequence and you can then specify another profile to print the report in descending sequence. You can also specify a different Group by Field field and therefore change the entire grouping sequence. Update report groups by using the Group sheet of the Profile Properties dialog.
To display the Group Sheet of the Profile Properties dialog, perform one of the following actions
-
Select the Properties command from the Profile menu and then click the Group tab.
-
Select the group that you want to update on your layout (that is, click in any space within the group) and then select the Group command from the Edit menu.
The Group sheet of the Profile Properties dialog is then displayed, as shown in the following image.
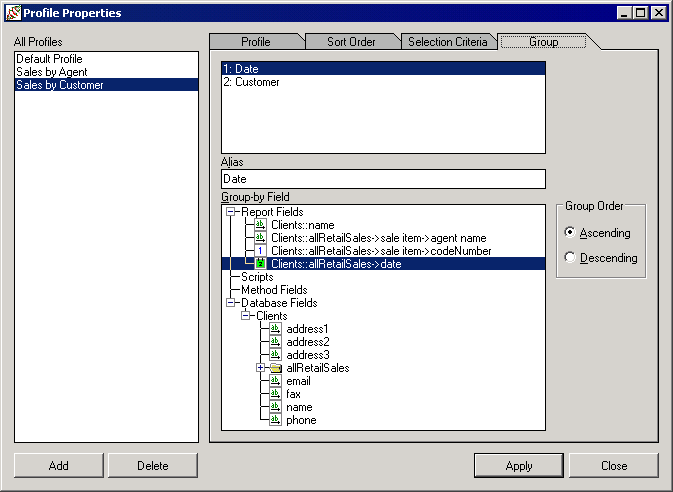
To update a report group
-
In the All Profiles list box, select a profile name to which this group is to be attached. If you have not created any profiles, the group is automatically attached to the default profile.
-
To change the alias name, enter a new alias name for your group in the Alias text box.
-
To change the field on which your group is based, select the field from the Group-by Field list box.
Fields of maximum length (for example, allSaleItems::fullDescription of type String with max length) specified as group fields are used as fields with a maximum length of 100. (Maximum length fields are not valid as group fields, as they exceed the JADE-defined limit for use in collection operations.)
-
Select the Ascending option button or the Descending option button to change the order of groups.
For example, if you select the Ascending sequence when grouping on client name, groups print from Abrahams to Zabotinsky. If you select the Descending sequence, the same data prints groups from Zabotinsky to Abrahams.
-
Click another tab if you want to make changes on other sheets of the Profile Properties dialog.
-
Click the Apply button to apply the additions or changes you have made or click the Close button to close the Profile Properties dialog.
To save the recent additions or changes when you close the dialog, you must click the Apply button immediately prior to closing the dialog. To abandon any additions and changes that you have made but not yet applied, do not click the Apply button immediately prior to clicking the Close button.
You can change the order of groups within your report and delete groups by using the section properties. For details, see "Setting the Section Properties", earlier in this chapter.

