Creating a New Group
As groups are specific to a report, if you create three groups levels, those three group levels are inherited by each profile that you create for your report.
In profiles, you can specify different fields on which to group, but each profile inherits the same number of groups you have created for your report.
Each subsequent group after the first group that you create for a report must be specified at a different level; that is, the subsequent group encompasses the previous group or is encompassed by the previous group.
In the customer list example, you would specify grouping by date at a higher level than the customer grouping. If you had specified grouping by date as the first group, you would then introduce customer grouping at a lower level.
To create the first group for a report
-
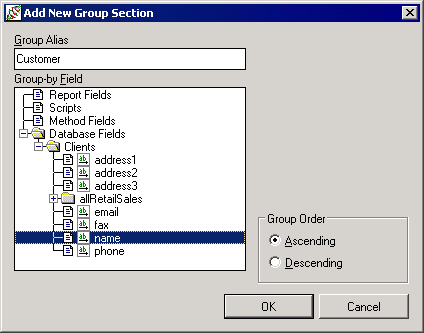
Select the Group command from the Insert menu. The Add New Group Section dialog, shown in the following image, is then displayed.

-
In the Group Alias text box, enter a name for your group; for example, Customer.
-
In the Group-by Field list box, select the field or script field on which your group is to be based.
In the example in the above image, the field Clients::name is selected. In this case, the group is created before report fields are placed in the report design. When the report is run, the group footer is printed for the current client and the group header is printed for the next client each time the client (customer) name changes.
Fields of maximum length (for example, allSaleItems::fullDescription of type String with max length) specified as group fields are used as fields with a maximum length of 100. (Maximum length fields are not valid as group fields, as they exceed the JADE defined limit for use in collection operations.)
Only script fields that do not, directly or indirectly, reference summary fields are displayed.
-
Select the Ascending option button or the Descending option button to specify the order of this group. For example, if you select the Ascending sequence when grouping on client name, groups print from Abrahams to Zabotinsky. If you select the Descending sequence, the same data produces groups from Zabotinsky to Abrahams.
-
Click the OK button to apply the new group to your report.
To abandon your entries, click the Close button before you click the OK button.
When you apply the new group, the group header section and a group footer section are automatically added to your report. The Group Alias name and the Group By field that you specified are positioned automatically in your group header.
To create a second group for the same report
-
Follow the procedure that you used to create your first group, described in the previous instruction.
The Position Group group box is shown for the second and any subsequent group. For the second group, two position options are enabled.
Use the additional Position Group group box on the Add New Group Section dialog to position this group in relation to the first group, as shown in the following image.

-
To select the relationship of this group to the group that you added previously, select the As highest-level option button or the As lowest-level option button.
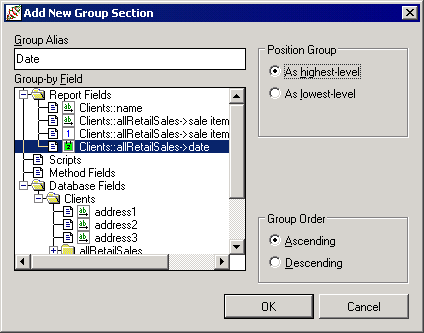
In the example in the above image, the date field has been selected at a higher level than the previous group (which was grouped on client name and which was called Customer).
The report design now contains report fields, one of which you can use for the new group.
This grouping results in the JADE Report Writer Designer application grouping the sales data by date and by customer within that sales data.
The following image shows the sequence that is produced if total sales are required by customer group, by date group, and for the entire report.
 REPORT
    DATE 1
        CUSTOMER 1
            SALE ITEM 1
            SALE ITEM 2
            SALE ITEM 99
        CUSTOMER 1 TOTAL

        CUSTOMER 2
            SALE ITEM 1
            SALE ITEM 2
            SALE ITEM 99
        CUSTOMER 2 TOTAL

        CUSTOMER 99...

    DATE 1 TOTAL

    DATE 2
        CUSTOMER 1
            SALE ITEM 1
            SALE ITEM 2
            SALE ITEM 99
        CUSTOMER 1 TOTAL

        CUSTOMER 2
            SALE ITEM 1
            SALE ITEM 2
            SALE ITEM 99
        CUSTOMER 2 TOTAL

        CUSTOMER 99 ...

    DATE 2 TOTAL

    DATE 99 ...

 REPORT TOTAL
To create a third or subsequent group for the same report
-
Follow same procedure that you used to create your first group, described earlier in this section. When adding a third or subsequent group, three position options are enabled on the Position Group group box on the Add New Group Section dialog, as shown in the following image.

-
To specify the position of the new group in relation to the group that has the focus on your layout (that is, the one that you clicked), click the Before selected group option button.
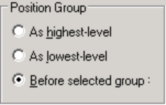
Your new group is then positioned at a higher level than the selected group.
Alternatively, select one of the other option buttons to position the new group at the highest or lowest level, as described in the previous instruction.

