Creating Selection Criteria for Your Join
Having selected the collections to join, you can make the join selective on the value of a field in one of the collections, if required.
With any field type, you can apply standard comparison operators to make your selection.
If a selection field is a string value, you can also use pattern matching with the starts with, ends with, and like comparison operators.
The is one of and is between operators enable you to specify multiple comparison values; for example, to specify a range of days that fall between certain dates.
To create selection criteria for your join
-
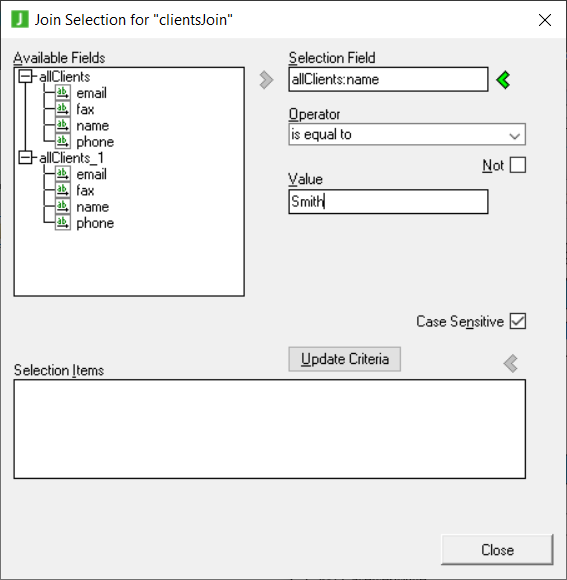
Click the Selection button in the Join pane at the top left of the Joins sheet.
The Join Selection dialog, shown in the following image, is then displayed.

-
Select a field to use as a selection field from the Available Fields list box at the left of the dialog.
The selected field and the right-pointing arrow are then highlighted. The list of fields in the Available Fields list box is derived from the collections that you have selected to join.
-
Click the right-pointing arrow to complete the selection. Alternatively, double-click the field to make the selection.
The selected field is then displayed in the Selection Field list box at the right of the dialog. In the previous image, the client name field is selected.
-
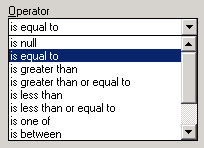
Select an operator from the Operator list box at the right of the dialog.
In the following image, the operator is equal to is selected.

-
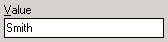
In the Value text box of the Join Selection dialog, enter a value with which your selection field is to be compared.
If you use the starts with, ends with, or like comparison operators with a string value, you can also use pattern matching. If you use the is one of, or is between operators, you can also specify multiple values by adding them to the list of values. For details, see the instructions later in this section.
In the following image, the value Smith has been entered.

In the examples earlier in this instruction, the following selection formula has been built.
Clients:client name is equal to Smith
When this selection criterion is applied, the join applies only to clients named Smith.
-
Check the Not check box to negate your selection criterion formula.
If you check this box, the formula that you have built as a selection criterion is negated. For example, if you formulated Clients:client name is equal to Smith and you then check the Not check box, your join criteria is based on all clients except those named Smith.
-
Uncheck the Case-sensitive check box if you do not want to apply case-sensitivity to your selection.
The Case-sensitive check box is enabled only if your selection contains alphabetic characters. By default, this check box is checked.
-
Click the Update Criteria button to add your selection criterion formula to the Selection Items list box at the bottom of the sheet.
You can enter any number of selection criteria. (Follow steps 2 through 8 of this instruction for each one that you create.) For example, you could add another formula, as follows.
Clients:email is null
If you then check the Not check box for this formula, you effectively refine join criteria to those clients named Smith, but only those who have an e-mail address. The following image shows the Selection Items list box as it is displayed with these selection criteria applied.

-
Update a selection criterion in the Selection Items list box by double-clicking the entry, if required.
The values are then redisplayed in the relevant controls and you can change them as required.
-
Click the Close button when you have completed your selections.

Using the starts with, ends with, or like comparison operators with string values enables pattern matching.
To use pattern matching with string selection criteria
-
Select one of the following operators from the Operator list box.
-
To compare a character or sequence of characters at the start of the selection string value, use starts with.
-
To compare a character or sequence or characters at the end of the selection string value, use ends with.
-
To apply pattern matching to the selection string value, use like.
-
-
Enter selection criteria in the Value text box, using a single pattern string. The pattern string can be any sequence of characters and it can include any of the following wildcard characters.
-
? or _ representing any single character
-
* or % representing any substring sequence of one or more characters, including an empty substring
You can use the backslash character (\) to nullify any wildcard character so that it is treated as a normal character in the pattern string. For example, \? is treated as a literal question mark character (that is, ?) and not as a wildcard character.
-
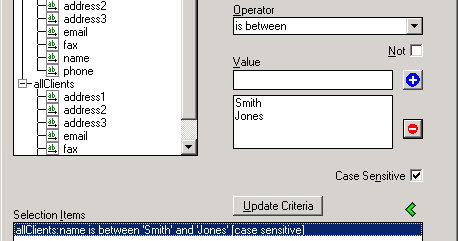
Selecting the is one of or is between comparison operators enables you to specify multiple comparison values.
To specify multiple comparison values
-
Select the is one of or is between comparison operator from the Operator list box.
A list box is then displayed underneath the Value text box, and two buttons are displayed to enable you to add multiple comparison values.
-
Specify a value in the Value text box and then click the Add value to list button to add this value to the list of comparison values. Add any additional values to the list, as required.
-
To remove a comparison value from the list, select the required value and then click the Remove value from list button.
The selected value is then deleted from the list of comparison values.
-
Click the Update Criteria button when you have finished building your list of selection values.
The following image shows a selection item where the selection criterion is all client names between Smith and Jones.