Subclassing a JADE Control Class
The first step in creating your own JADE control is to subclass an existing JADE control class.
To subclass a JADE control class
-
From the Class List of the Class Browser, select the control class that you want to subclass.
-
Select the Add command from the Classes menu. The Define Class dialog is then displayed.
-
Specify the name of your control in the Name text box of the Class sheet and then use the Subclass of combo box to select the control that you want to subclass; for example,
-
Select your map file in the Map File combo box and then select your access, type, and persistence options, if required.
-
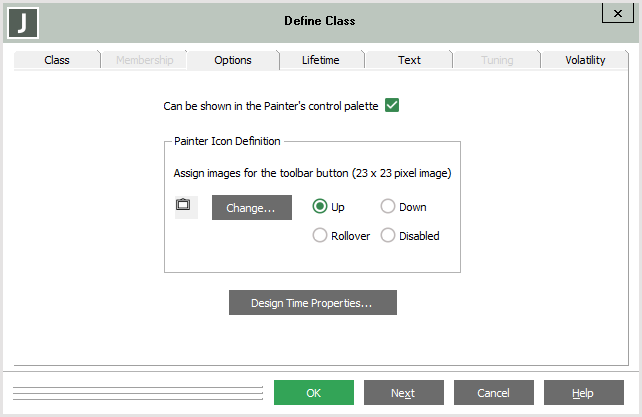
Click the Options sheet. The Options sheet of the Define Class dialog is then displayed, to enable you to set properties that are specific to your class.
An example of the Options sheet is shown in the following image.

-
Click the Options sheet so that you can:
-
Uncheck the Can be shown in the Painter’s control palette check box if you do not want the image (icon) for your control displayed in the control palette of JADE Painter. (By default, the control is displayed.)
-
The Painter Icon Definition group box enables you to select how the picture is to be displayed on the tool of the Painter Control palette for this control for each of the four states associated with them; that is, up, down, roll over, and disabled.
Click the Up, Rollover, Down, or Disabled option button and then click the Change button to specify a toolbar icon or to change an existing icon for the selected image state (which defaults to the Up state). The common File Open dialog (titled Select the <state> image file name) is then displayed, to enable you to select an existing graphics file whose image you want displayed for the Control subclass in the selected state.
-
Repeat step b for each of the states associated with the image that you require.
Although you do not have to define images for each state associated with the control picture, a down state image provides users with visual confirmation that the icon has been clicked.
-
Click the Design Time Properties button if you want to specify the control properties that are listed in the Properties dialog during your Painter sessions. (A value assigned to a design time property can be saved and used as the default value when a runtime instance of the control is created.)
The Design Time Properties dialog is then displayed. For details about this dialog, see "Selecting Your Design Time Properties", in the following section.
-
When you have created your new control class (and specified your design time properties, if required), it is displayed as a subclass of the selected control class in the Class List of the Class Browser .

