The Print Options dialog, accessed by clicking the Print Selected icon in the Browser toolbar or by selecting the Print Selected command from the File menu, has options that enable you to print selected elements in the JADE development environment.
The current element determines the selective print options. For example, the Print Options dialog accessed from the Class Browser provides different options from that accessed from the Primitive Types Browser or Interface Browser.
You can access the Print Options dialog only from the Class Browser, Primitive Types Browser, Interface Browser, Global Constants Browser, and the Summary of Patches window.
The Print Selected command enables you to define how specific parts of your JADE development environment for the selected object is to be printed. It does not print output from runtime JADE applications, whose print requirements are defined using the
See also "Using the Relationship View Window" and "Printing Class or Primitive Type Constants", in Chapter 4 of this document, "Printing an Interface" in Chapter 14 of this document, and "
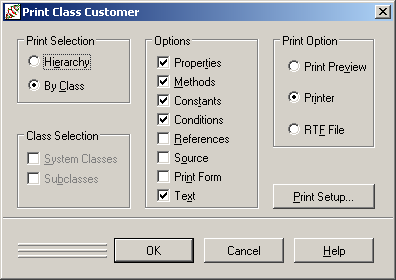
An example of the dialog that is displayed when you select a class in the Class List of the Class Browser is shown in the following diagram.
You can select operations documentation (technical objects such as subclasses, methods, or references) for development purposes, and user documentation (design-related objects such as forms) for such things as end-user sign-off.
Click the appropriate check boxes and option buttons for the selections that you require for your documentation. A check mark (✓) is displayed in check boxes of options that are selected for printing. Option buttons are displayed as filled, or solid, when selected.
Invalid selections for the selected element are dimmed; for example, if you are selecting your print options from the Class Browser and you select the Hierarchy Print Selection option button, the Sub Classes Class Selection check box and the References and Source check boxes in the Options group box are disabled.
To select the print options for the element selected in a browser window
When your selected element is a class, the Print Selection group box enables you to print detailed information for the class in class or hierarchy order. (This group box is displayed only when you access the Print Option dialog when you have selected a class in the Class Browser.)
The default By Class option button prints the inheritance of each selected class and its subclasses. For example, if you select printing of an Animal class by class, your output might be as follows:
Animals
Properties
Constants
JADE Methods
Bird
Properties
Constants
JADE Methods
Gull
Properties
Constants
JADE Methods
Parrot
Properties
Constants
JADE Methods
Alternatively, select the Hierarchy option button if you want to print a summary of information for the selected class in hierarchical order. For example, if you select hierarchical printing of an Animal class, your output might be as follows:
Animal
Bird
Kiwi
Parrot
Mammal
Cat
Dog
When the selected element is a class, the Class Selection group box enables you to select additional class details. (This group box is displayed only when you access the Print Option dialog when you have selected a class in the Class Browser and the By Class option button is selected in the Print Selection group box of the Print Options dialog.)
Check the System Classes check box if you want your print output to include system classes when printing the selected class in hierarchical order. (This check box is enabled only when the Hierarchy option button is selected in the Print Selection group box.)
Check the Subclasses check box if you want your print output to also include subclasses of the selected class when printing the detailed class information. (This check box is enabled only when the By Class option button is selected in the Print Selection group box and the selected class has subclasses.)
In the Options group box, select the information that you want or print for the selected element by checking check boxes that are not selected by default or unchecking any check box whose option is selected by default if you do not want to include that information in your print output.
Your print output can contain the following information, to meet your requirements.
The Properties check box, displayed when a class or property is the selected element, prints the properties and constants of the selected class (and subclasses, if applicable) or details of the selected property. Properties information is printed by default; that is, this check box is checked.
The Methods check box, displayed when a class, primitive type, interface, or method is the selected element, prints the JADE (user-defined) and external (system) methods for the selected class (and subclasses, if applicable) or primitive type, or details of the selected method. Method details are printed by default; that is, this check box is checked.
The Constants check box, displayed when a class, primitive type, interface, or constant is the selected element, prints the class constants provided by the selected class (and subclasses, if applicable) or primitive type, or details about the constant selected in the Properties List of the Class or Primitive Types Browser. Constant information is printed by default; that is, this check box is checked.
The Conditions check box, displayed when a class or primitive type is the selected element, prints the conditions defined in the selected class (and subclasses, if applicable) or the selected condition. Condition information is printed by default; that is, this check box is checked.
The References check box, displayed when a class is the selected element, prints the print all references (relationships) to the selected class (and subclasses, if applicable). References are not printed by default; that is, this check box is unchecked.
The References check box is enabled only when the By Class option button is selected in the Print Selection group box.
The Source check box, displayed when a class, primitive type, or method is the selected element, prints the method source (code) of the selected class (and subclasses, if applicable) or primitive type, or of the selected method. Method sources are not printed by default; that is, this check box is unchecked.
The Print Form check box, displayed when a class is the selected element, prints all form layouts defined in the JADE Painter when the selected class is the
The Text check box prints all associated text specified for the selected element. Text information is printed by default; that is, this check box is checked. For more details, see "Specifying Text for a Schema Element", earlier in this chapter.
If you do not want your selections to be output to the printer, select one of the following.
Print Preview option button, to preview the output on your workstation monitor.
For details about previewing print output, see "
RTF File option button, to output your selections to a Rich Text Format (.rtf) file in your working (bin) directory.
You can view your .rtf file output by using a text editor; for example, Word for Windows.
Click the Print Setup button if you want to change the setup of your printing. For details, see "Setting Up Your Printer", in the following subsection.
Click the OK button to confirm your selections. Alternatively, click the Cancel button to abandon your selections.