Use the Select Locales sheet from the Locales dialog to specify locales supported by the current schema.
To add locales
In the Available Locales list box, select the locale that you want to support.
Click the Add button, to move the selected locale to the Selected Locales list box.
Repeat this step for each locale that you want to select. Alternatively, to select all locales, click the Add All button.
Check the Set As Default Locale check box if you want to set a locale selected in the Selected Locales list box as the default locale for the schema.
You can select only a base (that is, non-clone) locale as the default locale.
Click the OK button. Alternatively, click the Cancel button to abandon your changes.
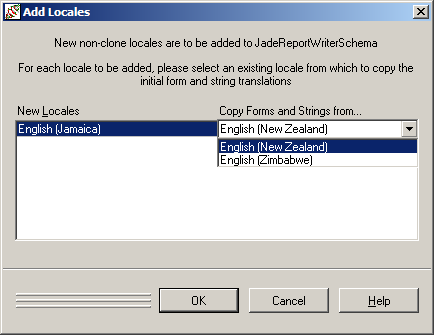
The Add Locales dialog, shown in the following diagram, is then displayed.
For each locale that you have added, the Add Locales dialog enables you to specify the locale from which the initial form and string translations are copied.
To specify the locale from which to copy initial translations
In the New Locales list box of the Add Locales dialog, select a locale to be added. The combo box is then displayed.
From the Copy Forms and Strings from… combo box, select the locale from which to copy the initial translations for the new locale.
Repeat steps 1 and 2 of this instruction for each new locale that you added.
Click the OK button. Alternatively, click the Cancel button to abandon your selections.
The Updating Locales progress dialog is then displayed, followed by the Schema Browser when the initial locale translations have been performed.