Select the Add Time Format command from the Formats menu.
The Add Time Format dialog, shown in the following diagram, is then displayed.
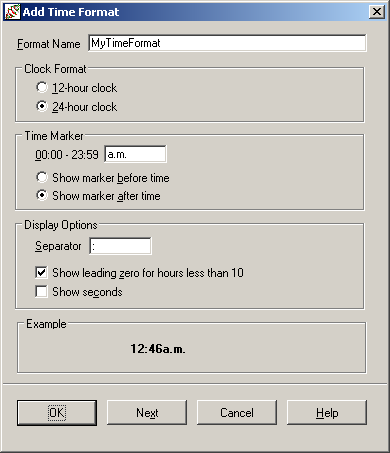
In the Format Name text box, specify a name for your time format. You must specify a value in this text box. An exception is raised if the specified name does not start with an uppercase letter or the format name is not unique; that is, your schema already contains a format with that name.
In the Clock Format group box, select the clock format that you require for your date; that is, the 12-hour or the 24-hour clock. By default, the date is formatted in the 24-hour format.
If you have selected the default 24-hour clock format option, in the 00:00 - 23:59 text box of the of the Time Marker group box, you can optionally specify words or symbols that you want displayed before or after the time format; for example, EST for Eastern Standard Time.
If you have selected the 12-hour clock format option, in the 00:00 - 11:59 text box of the Time Marker group box you can optionally specify words or symbols that you want displayed in the time format before noon (for example, A.M. or am) and in the 12:00 - 23:59 text box, you can optionally specify words or symbols that you want displayed in the time format after noon (for example, P.M. or pm).
If you specified a time marker, select the Show marker before time option button if you want to display the time marker before the time, if required (for example, EST 09:46:32). By default, the marker is displayed after the time; that is, the Show marker after time option button is selected (for example, 09:46:32 A.M.).
In the Separator text box in the Display Options group box, specify the separator that you want displayed between the hours, minutes, and seconds of your time format; for example, a stroke character (/). The default separator is a colon character (:).
Uncheck the Show leading zero for hours less than 10 check box of the Display Options group box if you do not want hours less than 10 to be displayed with leading zeros; for example, 9:53:14. By default, leading zeros are displayed.
Uncheck the Show seconds check box of the Display Options group box if you do not want seconds to be displayed in your time format; for example, 09:15:58 am. By default, seconds are displayed.
Click the OK button when you have defined your new time format. Alternatively, you can click the Next button to redisplay the Add Time Format dialog so that you can define another time format or you can click the Cancel button to abandon your selections.